♥ My Tou ♥
All of my tutorials are written by me Any resemblance to any other tutorial is purely coincidental. Do NOT claim as your own or alter them in any way. Hotlinking is strictly prohibited. Anything you create as a result of following my Tuts is yours to do with what you wish so long as it is not for monetary gain In other words you can not sell what you make from my Tuts Thankyou♥
♥ My Blinkie ♥

Blog Archive
- 2014 (27)
- 2013 (128)
- 2012 (198)
-
2011
(481)
- December(15)
- November(34)
- October(41)
- September(37)
- August(40)
- July(32)
- June(54)
- May(63)
- April(42)
-
March(57)
- ♥ Crazy Train ♥
- ♥ Old 66 ♥
- ♥ Ginger Snaps ♥
- ♥ Toxic Candy ♥
- ♥ Autumn Days ♥
- ♥ Fairy Dreams ♥
- ♥ Picture This ♥
- ♥ Lovable ♥
- ♥ Easter Hunt ♥
- ♥ Easter Moments ♥
- ♥ Desire ♥
- ♥ Sad Boy ♥
- ♥ Full Moon ♥
- ♥ The Devil Made Me Do It ♥
- ♥ Sleepy Time ♥
- ♥ Easter Dreams ♥
- ♥ Easter Pop ♥
- ♥ Easter ♥
- ♥ Welcome To The Jungle ♥
- ♥ Boot Scoot & Boogie ♥
- ♥ Bird Watching ♥
- ♥Rock n Roll ♥
- ♥ Hot Lips ♥
- ♥ Peaceful ♥
- ♥ I Love You Sexy ♥
- ♥ Happy Easter ♥
- ♥ Spring Fashion ♥
- ♥ My Journal ♥
- ♥ Girlz ♥
- ♥ Spring Time ♥
- ♥ Pause Cafe ♥
- ♥ Spring Is Coming ♥
- ♥ Boys Will Be Boys ♥
- ♥Sweet Lil' Thing ♥
- ♥ Tropical Treat ♥
- ♥ Music In My Soul ♥
- ♥ Satin Dreams ♥
- ♥ Day at the Beach ♥
- ♥ French Kiss ♥
- ♥ A Better World ♥
- ♥ Its Mine All Mine ♥
- ♥ Wrap Me Up In Chocolate ♥
- ♥I Can Patch You Up♥
- ♥ Chocolate Delight ♥
- ♥ Living In A Dream ♥
- ♥ Beautiful Flowers ♥
- ♥ Too Hot ♥
- ♥ I Be So Lucky ♥
- ♥ One Fine Day ♥
- ♥ Spring Break ♥
- ♥ Long Black Train ♥
- ♥ Fairy Garden ♥
- ♥ Hush ♥
- ♥ Im Irish ♥
- ♥Teachers Pet♥
- ♥ Country Girl ♥
- ♥ My Garden ♥
- February(34)
- January(32)
- 2010 (46)
♥ My Licenses ♥
Tony Tzanoukakis-TTZ331
Keith Garvey-KG1356
GORJUSS ART-SW1123
Ismael Rac-IRL098C
Zindy-ZZT3017
PTE-PTE0365
Gild-GildLYCO
CDO-CDO-1657
AMI-AMILYCO
MPT-MPT9633
CILM-CI-1635LM
SATC-SATC1136
UYA-UYA3238
PFD-PFD_AngelLC405
The Psp Project-TPP01171
Elias Chatzoudis-EAS10190
Arthur Crowe AC780
MTA-3740
♥ Crazy Train ♥
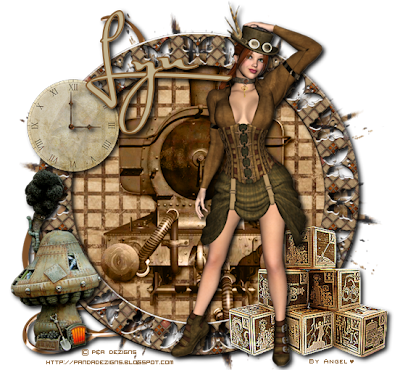
To View Tag In Proper Size Click On The Tag
Supplies Needed
Scrapkit by Sweet Cravings Scraps called Crazy Train this is PTU you can purchase kit from
Here
Mask WSL_Mask 38 at weescotslass Here
Font of choice or the one im using is Satisfaction
Lets Get Started
Open new image 650x550
Open SCS_CrazyTrain_Paper3 copy paste as new layer apply mask merge group duplicate merge down
Open SCS_CrazyTrain_Flare1 copy paste as new layer add drop shadow
Open SCS_CrazyTrain_Frame3 copy paste as new layer resize 70 percent with magic wand click in frame modify expand by 2
open SCS_CrazyTrain_Paper2 copy paste as new layer invert delete on keyboard select none drag paper under frame add drop shadow to frame
Open SCS_CrazyTrain_Train copy paste as new layer resize 64 percent blend mode Luminace (L) drag under frame add drop shadow
Open SCS_CrazyTrain_Clock2 copy paste as new layer resize 25 percent sharpen add drop shadow
Open SCS_CrazyTrain_ClockHands with selection tool go around the small hand copy paste as new layer resize 11 percent move this to the 3
Go back to the hands undo selection redo selection on big hand copy paste as new layer resize resize 10 percent image rotate 90 right add drop shadow to both hands
Open SCS_CrazyTrain_Blocks copy paste as new layer resize 43 percent effects enhance add drop shadow
Open SCS_CrazyTrain_Steampunk copy paste as new layer resize 49 percent add drop shadow
Open the tube copy paste as new layer add drop shadow
Add your name Font Satisfaction forground #855b2e background #c1b390 add drop shadow
Add your copyright info
resize & save your tag
Love to see your results please email to me so i can put in my show off blog
Thankyou ♥
Written by ©Lyn(akaAngel) 31st March 2011, any similarity to any other tutorial is purely coincidental!
Labels:
PTU ♥
♥ Old 66 ♥
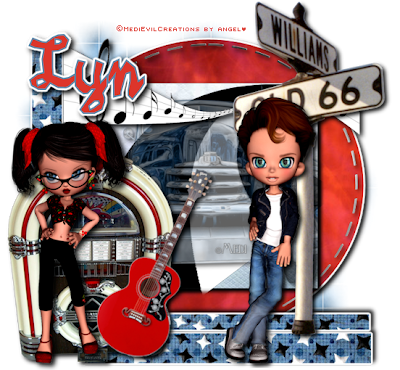
Supplies Needed
Scrapkit by Sweet Cravings Scraps called route 66 this is PTU Can be purchase the kit Here
MaskWSL_Mask 84 at weescotslass Here
Template by Me this is FTU Here
Fonts of choice or the one im using is Syncopated Script
Lets Get Started
Open Template duplicate close original Template canvas size 650x500 delete © layer
Open SCS_Route66_Paper4 copy paste as new layer apply mask merge group
Go to Raster 2 select all float defloat Open SCS_Route66_Paper5 copy paste as new layer invert delete on keyboard select none add gradient glow & add drop shadow
Go to raste 3 select all float defloat Open SCS_Route66_Paper3 copy paste as new layer invert delete on keyboard select none add drop shadow
Go to Raster 4 select all float defloat Open SCS_Route66_Paper1 copy paste as new layer invert delete on keyboard while still selected
Open SCS_Route66_SwirledRoad copy paste as new layer delete on keyboard still selected Open SCS_Route66_Car resize 65 percent delete on keyboard select none lower opacity 62 percent add drop shadow to raster 4 & car & road
Go to Raster 5 select all float defloat Open SCS_Route66_Paper17 copy paste as new layer invert delete on keyboard add gradient glow & add drop shadow
Go to Raster 6 select all float defloat Open SCS_Route66_Paper1 copy paste as new layer invert delete on keyboard add gradient glow & add drop shadow
merge down raster 6 to raster 5 duplicate image rotate 90 percent left see my tag for reference
Open SCS_Route66_MusicNotes copy paste as new layer resize 60 percent add drop shadow
Open SCS_Route66_JukeBox copy paste as new layer resize 70 percent add drop shadow
Open SCS_Route66_Guitar copy paste as new layer resize 65 percent image rotate right 25 percent add drop shadow
Open SCS_Route66_StreetSign copy paste as new layer resize 90 percent add drop shadow
Open the medievil tube copy paste as new layer mirror resize add drop shadow
Open the medievil tube copy paste as new layer resize add drop shadow
Add your name Font Syncopated Script forground #5a87aa background #dd352b effects add gradient glow & add drop shadow
Add your copyright info
resize & save your tag
Love to see your results please email to me so i can put in my show off blog
Thankyou ♥
Written by ©Lyn(akaAngel) 31st March 2011, any similarity to any other tutorial is purely coincidental!
Labels:
PTU ♥
♥ Ginger Snaps ♥

Supplies Needed
Scrapkit by Designs by K called Ginger Snaps this is PTU You Can go to the site to find out how to Purchase the kit Here
Mask WSL_Mask 178 at weescotslass Here
Mask WSL_Mask 98 at weescotslass Here
Tube of choice im using ©Pinuptoons you will find this at CDO Here
Font of choice or the one im using is Sissyneck
Lets Get Started
Open km-dbk-gingersnaps-paper4 copy paste as new layer apply mask178 merge group
Open km-dbk-gingersnaps-paper11 copy paste as new layer apply mask98 merge group
Go to preset shape circle draw circle in middle of tag background #782623 forground null width 10
click in circle with magis wand Open km-dbk-gingersnaps-blingstrands copy paste as new layer resize 65 percent selection invert delete on keyboard add drop shadow to circle & bling strands effects enhance to strands
go to circle click on the circle with magic wand Open km-dbk-gingersnaps-paper3 copy paste as new layer invert delete on keyboard
Open km-dbk-gingersnaps-bowpink copy paste as new layer add drop shadow
Open Copy km-dbk-gingersnaps-cocoamug copy paste as new layer resize 60 percent add drop shadow click on marshallows in the cup add remove noise uniform 100 monochrome checked add drop shadow select none
Open km-dbk-gingersnaps-cinnamonsticks copy paste as new layer resize 74 percent image rotate 20 right add drop shadow
Open km-dbk-gingersnaps-gingerbreadgirl copy paste as new layer resize 45 percent add drop shadow
Open Copy km-dbk-gingersnaps-gingerbreadboy copy paste as new layer resize 40 percent image rotate 20 percent left add drop shadow
Open your tube copy paste as new layer add drop shadow
Add your name & the words Ginger Snaps Font Sissyneck forground #752221 background #8d2b2a add gradient glow & add drop shadow
Add your copyright info
resize & save your tag
Love to see your results please email to me so i can put in my show off blog
Thankyou ♥
Written by ©Lyn(akaAngel) 29th March 2011, any similarity to any other tutorial is purely coincidental!
Labels:
Pinuptoons,
PTU ♥
♥ Toxic Candy ♥
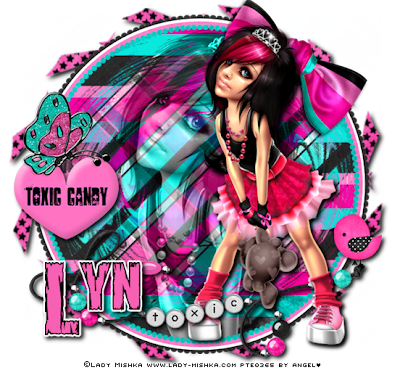
Supplies Needed
Scrapkit by cinnamonscraps called Toxic candyland this is FTU Can be downloaded Here
Mask WSL_Mask 73 at weescotslass Here
Mask WSL_Mask 97 at weescotslass Here
Tube of choice im using ©Lady Mishka i brought my license & tube at PTE she is no longer selling there you can purchase her tubes Here
2 Fonts of choice or the one im using is Shredded
Lets Get Started
Open CS_toxiccandyland_paper12 copy paste as new layer apply mask97 merge group
Open CS_toxiccandyland_frame4 copy paste as new layer click in frame with magic wand modify by 3
Open CS_toxiccandyland_paper16 copy paste as new layer invert delete on keyboard drag under frame
Open CS_toxiccandyland_paper10 copy paste as new layer apply mask73 merge group
Open tube copy paste as new layer delete on keyboard blend mode Luminace (L) lower opacity 65 add drop shadow to tube & frame
open main tube copy paste as new layer add drop shadow
Open Copy CS_toxiccandyland_beadedwordstring copy paste as new layer resize 80 percent add drop shadow
go back to main tube duplicate arrange to top erase left leg see my tag for reference
Open Copy CS_toxiccandyland_bow5 copy paste as new layer resize 80 percent mirror add drop shadow
Open CS_toxiccandyland_candy6 copy paste as new layer resize 85 percent add drop shadow
Open CS_toxiccandyland_bird1 copy paste as new layer resize 45 percent mirror add drop shadow
Open CS_toxiccandyland_butterfly10 copy paste as new layer resize 67 percent add drop shadow
Add your name Font Shredded forground #000000 background #f661b3 add gradient glow & add drop shadow
Add your copyright info
resize & save your tag
Love to see your results please email to me so i can put in my show off blog
Thankyou ♥
Written by ©Lyn(akaAngel) 29th March 2011, any similarity to any other tutorial is purely coincidental!
Labels:
FTU ♥
♥ Autumn Days ♥
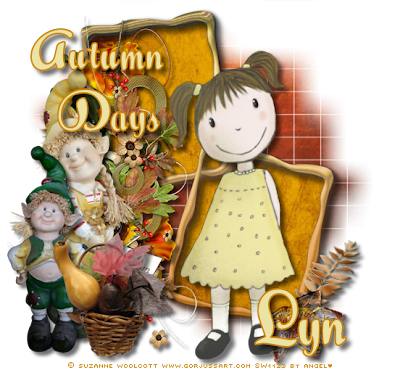
To View Tag In Proper Size Click On The Tag
Supplies Needed
Scrapkit by Babycakes Scraps called Fall Frolic Kit this is PTU you can purchase kit from
Here
Tube of choice im using ©Suzanne Woolcott Here
Mask WSL_Mask 84 at weescotslass Here
Font of choice or the one im using is Scarlet Ribbons
Lets Get Started
Open new image 650x550
Open bcs_paper_three copy paste as new layer apply mask merge group duplicate merge down
Open bcs_gold_frame copy paste as new layer resize 54 percent with magic wand click in frame modify expand by 9
open bcs_paper_nine copy paste as new layer invert delete on keyboard select none drag paper under frame add drop shadow to frame
Open bcs blossom stem copy paste as new layer resize 44 percent add drop shadow
Open bcs_autumn_cluster copy paste as new layer resize 60 percent image rotate 90 percent add drop shadow
Open bcs_gnome copy paste as new layer resize 36 percent add drop shadow
Open bcs_gnometwo copy paste as new layer resize 30 percent add drop shadow
Open bcs_basket copy paste as new layer resize 25 percent add drop shadow
Open your tube copy paste as new layer add drop shadow
Add your name & the words Autumn Days Font Scarlet Ribbons forground #ca8302 background #ebe2a4 add drop shadow
Add your copyright info
resize & save your tag
Love to see your results please email to me so i can put in my show off blog
Thankyou ♥
Written by ©Lyn(akaAngel) 28th March 2011, any similarity to any other tutorial is purely coincidental!
Labels:
Autumn,
PTU ♥,
Suzanne Woolcott
♥ Fairy Dreams ♥
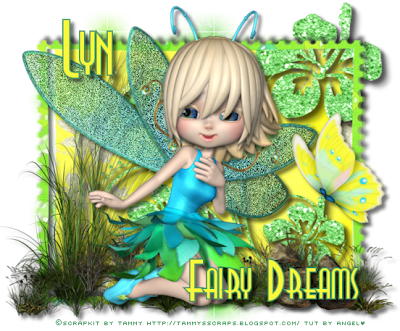
To View Tag In Proper Size Click On The Tag
Supplies Needed
Scrapkit by Tammy Scraps called Fairy Dreams this is PTU you can Purchase kit from
Here
Mask WSL_Mask 84 at weescotslass Here
Font of choice or the one im using is REALVIRTUE
Lets Get Started
Open new image 650x550
Open Fairy Dreams Paper 6 copy paste as new layer apply mask merge group duplicate merge down
Open Fairy Dreams Glitter Doodle 6 copy paste as new layer add drop shadow 6 6 56 8.00 repeat shadow
Open Fairy Dreams Frame 3 selection select all float defloat open Fairy Dreams Paper 11 copy paste as new layer invert delete on keyboard image rotate 90 percent
delete original layer add drop shadow 6 6 56 8.00
Open Fairy Dreams Grass 3 copy paste as new layer resize 64 percent add drop shadow 6 6 56 8.00
Open Fairy Dreams Wheat 2 copy paste as new layer resize 90 percent add drop shadow 6 6 56 8.00
Open Fairy Dreams Grass 1 copy paste as new layer add drop shadow 6 6 56 8.00
click in frame with magic wand Open Fairy Dreams Paper 8 copy paste as new layer invert delete on keyboard drag this under the doodle layer select none
Open Fairy Dreams1 copy paste as new layer add drop shadow 6 6 56 8.00
with magic wand click in the wings of the fairy apply add remove noise Uniform 100 monochrome checked select none add drop shadow 6 6 56 8.00
Open Fairy Dreams Butterfly 1 copy paste as new layer resize 35 percent add drop shadow 6 6 56 8.00
Open Fairy Dreams Rocks 1 copy paste as new layer resize 45 percent add drop shadow 6 6 56 8.00
Add your name & the words Fairy Dreams Font REALVIRTUE forground #4a9a64 background #f7f73b add drop shadow
Add your copyright info
resize & save your tag
Love to see your results please email to me so i can put in my show off blog
Thankyou ♥
Written by ©Lyn(akaAngel) 27th March 2011, any similarity to any other tutorial is purely coincidental!
Labels:
PTU ♥
♥ Picture This ♥
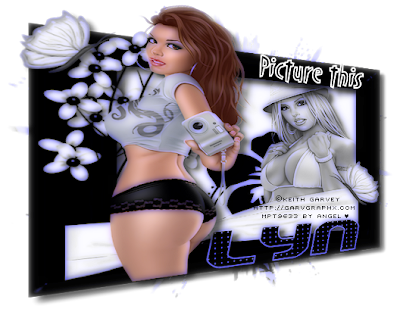
To View Tag In Proper Size Click On The Tag
Supplies Needed
Scrapkit by Treasures by Terry called Black and White this is FTU you can download kit from
Here
2 Tubes of choice im using ©Keith Garvey he is no longer selling at MPT this is where i brought hes art work & my license
But you can find all hes tubes PSP Tubes Emporium
Here
Mask WSL_Mask 38 at weescotslass Here
Font of choice or the one im using is OkrienHmkBold & Plastique
Lets Get Started
Open new image 650x550 drop shadow used 6 6 60 12.00
Open Paper 5 copy paste as new layer apply mask merge group duplicate merge down
Open Black Frame copy paste as new layer resize 144 percent image rotate right 90 percent with magic wand click in frame modify expand by 2
open Paper 2 copy paste as new layer invert delete on keyboard select none drag paper under frame add drop shadow to frame
Open White wrap bow copy paste as new layer resize 150 percent add drop shadow
Open Wildflowers copy paste as new layer image rotate 20 right add drop shadow
Open Wildflowers copy paste as new layer image rotate 20 left mirror add drop shadow
Open White butterfly copy paste as new layer resize 45 percent image rotate 20 right duplicate mirror add drop shadow
Open tube copy paste as new layer Luminance (L) add drop shadow 10 10 60 12.00 drag tube under frame
Open main tube copy paste as new layer add drop shadow
Add the words Picture This Font OkrienHmkBold forground #ffffff background #000000
Add your name Font Plastique forground #ffffff background #000000 effects weave with this setting
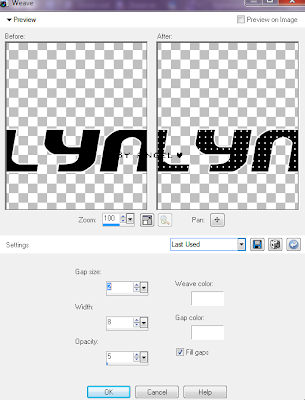
add drop shadow
merge all visible
with pick tool on the bottom right corner pull it in wards see my preview

Add your copyright info
effects Xero Porcelain with this setting
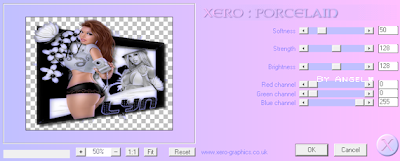
Repeat Porcelain
resize & save your tag
Love to see your results please email to me so i can put in my show off blog
Thankyou ♥
Written by ©Lyn(akaAngel) 27th March 2011, any similarity to any other tutorial is purely coincidental!
Labels:
FTU ♥,
Keith Garvey
♥ Lovable ♥

To View Tag In Proper Size Click On The Tag
Supplies Needed
Scrapkit by cinnamon scraps called You Color My World this is FTU you can download kit from
Here
Tube of choice im using ©Elias Chatzoudis he is no longer selling at MPT this is where i brought hes art work & my license
But you can find all hes tubes PSPTubes Emporium
Here
Mask WSL_Mask 119 at weescotslass Here
Font of choice or the one im using is AL Heavenly
Lets Get Started
Open new image 650x6000 drop shadow used in this tut 6 6 60 12.00
Open CS_youcolormyworld_world copy paste as new layer apply mask merge group
Open CS_youcolormyworld_frame6 copy paste as new layer resize 82 percent add drop shadow
Open CS_youcolormyworld_decostring2 copy paste as new layer resize 80 percent add drop shadow
Open SCS_youcolormyworld_feltleaves1 copy paste as new layer resize 45 percent add drop shadow
Open CS_youcolormyworld_butterfly2 copy paste as new layer resize 65 percent add drop shadow
Open CS_youcolormyworld_sun copy paste as new layer resize 70 percent add drop shadow
Open CS_youcolormyworld_heartflower copy paste as new layer resize 43 percent duplicate resize 85 percent add drop shadow
Open your tube copy paste as new layer drag under frame duplicate bring this one to top erase any over lapping add drop shadow
Open CS_youcolormyworld_wordart6 copy paste as new layer resize 75 percent add drop shadow
Add your name Font AL Heavenly forground #9bc31f background #ffffff add drop shadow repeat shadow
Add your copyright info
Love to see your results please email to me so i can put in my show off blog
Thankyou ♥
Written by ©Lyn(akaAngel) 25th March 2011, any similarity to any other tutorial is purely coincidental!
Labels:
Elias Chatzoudis,
FTU ♥
♥ Easter Hunt ♥

To View Tag In Proper Size Click On The Tag
Animation tag at end of Tut
Supplies Needed
Scrapkit by Sweet Cravings Scraps called Easter Parade this is PTU you can purchase kit from
Here
Mask WSL_Mask 116 at weescotslass Here
Animation Shop
Animation from PeachiesHere
Font of choice or the one im using is AceBinghamSH
Lets Get Started
Open new image 650x550 drop shadow used in this tut 5 5 54 10.00
Open SCS_EasterParade_Paper15 copy paste as new layer apply mask merge group duplicate merge down
Open SCS_EasterParade_Flower2 copy paste as new layer resize 30 percent add drop shadow
Open SCS_EasterParade_Tree copy paste as new layer resize 65 percent add drop shadow
Open SCS_EasterParade_Grass copy paste as new layer resize 75 percent add drop shadow
Open SCS_EasterParade_CuteGirl copy paste as new layer resize 80 percent add drop shadow
Open SCS_EasterParade_Eggs copy paste as new layer resize 70 percent add drop shadow
Open SCS_EasterParade_CuteOwl2 copy paste as new layer resize 44 percent add drop shadow
Open SCS_EasterParade_CuteBunny2 copy paste as new layer resize 55 percent mirror add drop shadow
Add your name & the word Easter Hunt Font AceBinghamSH forground #a7ad4c background #eda2b6 add drop shadow
Add your copyright info
copy merge open Animation shop paste as new layer right click on tag duplicate 4 times click on 1st frame select all
go to bird layer click on 1st frame select all drag this onto tag Go back to bird undo select all mirror go back to tag select all go back to bird drag onto tag
resize & save your tag
Love to see your results please email to me so i can put in my show off blog
Thankyou ♥
Written by ©Lyn(akaAngel) 25th March 2011, any similarity to any other tutorial is purely coincidental!

♥ Easter Moments ♥

To View Tag In Proper Size Click On The Tag
Supplies Needed
Scrapkit by Fantasy Moments called Happy Easter this is FTU you can download kit from
Here
Tube of choice im using ©Elias Chatzoudis PTE Here
Mask WSL_Mask 221 at weescotslass Here
Font of choice or the one im using is Qurve Thin
Lets Get Started
Open new image 650x550
Open FM-E-Papers-13 copy paste as new layer apply mask merge group duplicate merge down
Open FM-E-Element-79 copy paste as new layer resize 75 percent with magic wand click in frame modify expand by 2
open FM-E-Papers-5 copy paste as new layer invert delete on keyboard select none drag paper under frame
open tube copy paste as new layer delete on keyboard select none Luminace (L) lower opacity 46 to tube & add drop shadow to tube & frame 5 8 59 10.14
Open FM-E-Element-38 copy paste as new layer resize 85 percent add drop shadow -5 -8 59 10.14
Open FM-E-Element-63 copy paste as new layer resize 85 percent add drop shadow -5 -8 59 10.14
Open FM-E-Element-56 copy paste as new layer resize 33 percent add drop shadow -5 -8 59 10.14
Open FM-E-Element-19 copy paste as new layer resize 25 percent sharpen add drop shadow 5 8 59 10.14 duplicate mirror
Open tube copy & paste tube mirror add drop shadow -5 -8 59 10.14
Add your name & the words Easter Moments Font Qurve Thin forground #d4a9a9 background #eec5c8 inner bevel with this setting

add drop shadow -5 -8 59 10.14
Add your copyright info
resize & save your tag
Love to see your results please email to me so i can put in my show off blog
Thankyou ♥
Written by ©Lyn(akaAngel) 25th March 2011, any similarity to any other tutorial is purely coincidental!
Labels:
Easter,
Elias Chatzoudis,
FTU ♥
♥ Desire ♥
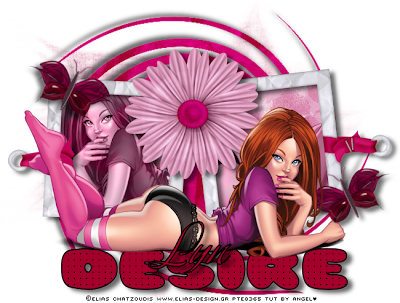
To View Tag In Proper Size Click On The Tag
Supplies Needed
Scrapkit by hunnybeedesign called Crimson desire this is FTU you can download kit from
Here
Tube of choice im using ©Elias Chatzoudis PTE Here
Mask Vix_Mask110 & Vix_Mask23 Here
Font of choice or the one im using is Buffet Script & Pleasantly Plump
Lets Get Started
Open new image 650x550
Open HunnyB_CrimsonDesire_Paper4 copy paste as new layer apply mask11O merge group duplicate merge down
Open HunnyB_CrimsonDesire_Paper9 copy paste as new layer apply mask23 merge group add drop shadow -5 -8 59 10.14
Open HunnyB_CrimsonDesire_PaperFrame_Crimson copy paste as new layer resize 75 percent image rotate 90 percent left with magic wand click in frame modify expand by 2
open HunnyB_CrimsonDesire_Paper10 copy paste as new layer invert delete on keyboard select none drag paper under frame
open tube copy paste as new layer delete on keyboard select none Luminace (L) add drop shadow to tube & frame 5 8 59 10.14
Open HunnyB_CrimsonDesire_Flower_PalePink copy paste as new layer resize 85 percent add drop shadow 5 8 59 10.14
Open HunnyB_CrimsonDesire_Butterfly1 copy paste as new layer resize 55 percent image rotate 20 right add drop shadow 5 8 59 10.14 duplicate mirror
Add your name Font Buffet Script forground #000000 background #a5002d add drop shadow 5 8 59 10.14
Add the words Desire Font Pleasantly Plump forground #000000 background #a5002d effects texture weave add drop shadow 5 8 59 10.14
Open tube copy & paste as new layer mirror add drop shadow 5 8 59 10.14
Add your copyright info
resize & save your tag
Love to see your results please email to me so i can put in my show off blog
Thankyou ♥
Written by ©Lyn(akaAngel) 25th March 2011, any similarity to any other tutorial is purely coincidental!
Labels:
Elias Chatzoudis,
FTU ♥
♥ Sad Boy ♥

To View Tag In Proper Size Click On The Tag
Supplies Needed
Scrapkit by hunnybeedesign called Grumble Bum this is FTU you can download kit from
Here
Tube of choice im using ©Half Pints you will find this in the Free Section at MPT
Here
Mask WSL_Mask 38 at weescotslass
Here
Font of choice or the one im using is JI Chubby Caps & OldGlory
Lets Get Started
Open new image 650x550 dop shadow used in this tut 4 4 59 14.50 unless stated differently
Open HunnyB_Grumblebum_pp5 copy paste as new layer apply mask merge group duplicate merge down
Open HunnyB_Grumblebum_frame3 copy paste as new layer with magic wand click in frame modify expand by 2
open HunnyB_Grumblebum_pp4 copy paste as new layer invert delete on keyboard open tube copy paste as new layer mirror delete on keyboard select none lower opacity 56 drag paper under frame add drop shadow to frame & tube with this setting 10 10 59 10.14
Open HunnyB_Grumblebum_bowbrown copy paste as new layer resize 85 percent image rotate 20 left add drop shadow
Open HunnyB_Grumblebum_foldedribbontan copy paste as new layer add drop shadow
Open HunnyB_Grumblebum_flair1 copy paste as new layer add drop shadow
Open tube copy paste as new layer add drop shadow
Add the words Sad Boy Font JI Chubby Caps forground #693a20 background #cb853f add drop shadow
Add your name & your name Font OldGlory forground #693a20 background #cb853f add drop shadow
Add your copyright info
resize & save your tag
Love to see your results please email to me so i can put in my show off blog
Thankyou ♥
Written by ©Lyn(akaAngel) 24th March 2011, any similarity to any other tutorial is purely coincidental!
Labels:
FTU ♥
♥ Full Moon ♥
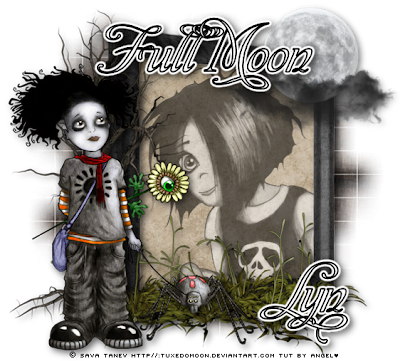
To View Tag In Proper Size Click On The Tag
Supplies Needed
Scrapkit by sweetcravingsscraps called Gothic Journey Express this is FTU you can download kit from
Here
Tube of choice im using ©Tuxedomoon FTU Here
Mask WSL_Mask 84 at weescotslass Here
Font of choice or the one im using is Affair
Lets Get Started
Open new image 650x550 dop shadow used in this tut 4 4 59 14.50 to
Open SCS_GIBT_GothJourExp_Paper9 copy paste as new layer apply mask merge group duplicate merge down
Open SCS_GIBT_GothJourExp_Frame2 copy paste as new layer resize 60 percent with magic wand click in frame modify expand by 2
open SCS_GIBT_GothJourExp_Paper3 copy paste as new layer invert delete on keyboard open tube copy paste as new layer delete on keyboard select none lower opacity 53 drag paper under frame add drop shadow to frame & tube
Open SCS_GIBT_GothJourExp_DeadTree copy paste as new layer resize 75 percent add drop shadow
Open SCS_GIBT_GothJourExp_SpiderwebDeadGrass copy paste as new layer add drop shadow
Open SCS_GIBT_GothJourExp_SpookyMoon copy paste as new layer resize 55 percent add drop shadow
Open tube copy paste as new layer add drop shadow
Add your name & the words Full Moon Font Affair forground #000000 background #ffffff add gradient glow & add drop shadow
Add your copyright info
resize & save your tag
Love to see your results please email to me so i can put in my show off blog
Thankyou ♥
Written by ©Lyn(akaAngel) 24th March 2011, any similarity to any other tutorial is purely coincidental!
Labels:
FTU ♥
♥ The Devil Made Me Do It ♥
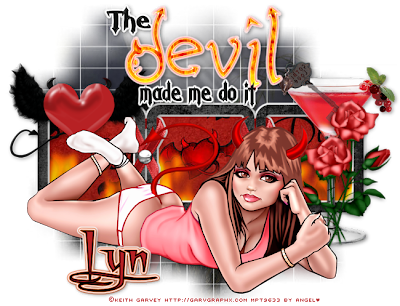
To View Tag In Proper Size Click On The Tag
Supplies Needed
Scrapkit by Randy Sins called Diable this is FTU you can download kit from
Here
Tubes of choice im using ©Keith Garvey he is no longer selling at MPT this is where i brought hes art work & my license
But you can find all hes tubes PSP Tubes Emporium
Here
Mask WSL_Mask 84 at weescotslass
Here
Font of choice or the one im using is A Charming Font Superexpanded
Lets Get Started
Open new image 650x550
Open cjsdreams_gothicback03 copy paste as new layer apply mask merge group duplicate merge down
Open rs_frame1 copy paste as new layer resize 50 percent with magic wand click in frame modify expand by 3
open rs_pap11copy paste as new layer invert delete on keyboard select none drag paper under frame add drop shadow & add gradient glow to frame
Open rs_devilheart4 copy paste as new layer resize 35 percent add drop shadow
Open rs_wordz1 copy paste as new layer resize 36 percent add gradient glow & add drop shadow
Open rs_drink1 copy paste as new layer resize 44 percent add drop shadow
Open rs_flames1 copy paste as new layer drag under frame erase all that is over lapping duplicate
Open rs_rose1 copy paste as new layer resize 40 percent image rotate 20 percent add drop shadow duplicate mirror move back near other rose see my tag for reference
Open tube copy paste as new layer add drop shadow
Add your name Font A Charming Font Superexpanded forground #000000 background #b72124 add gradient glow #f4520e add drop shadow repeat gradient glow
Add your copyright info
resize & save your tag
Love to see your results please email to me so i can put in my show off blog
Thankyou ♥
Written by ©Lyn(akaAngel) 24th March 2011, any similarity to any other tutorial is purely coincidental!
Labels:
FTU ♥,
Keith Garvey
♥ Sleepy Time ♥
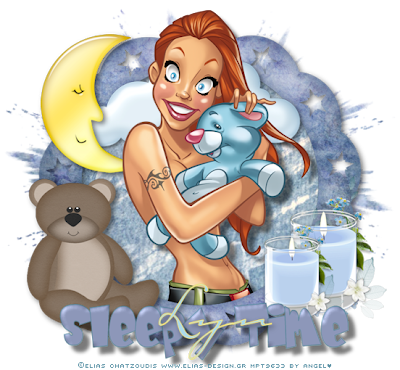
To View Tag In Proper Size Click On The Tag
Supplies Needed
Scrapkit by Sweet Cravings Scraps called girls just want have fun this is PTU you can purchase kit from
Here
Tube of choice im using ©Elias Chatzoudis he is no longer selling at MPT this is where i brought hes art work & my license
But you can find all hes tubes PSP Tubes Emporium Here
Mask WSL_Mask 38 at weescotslass Here
Font of choice or the one im using is Baby Kruffy & Carpenter Script
Lets Get Started
Open new image 650x550 drop shadow used in this tut is 4 4 54 13.04 unless stated differently
Open SCS_GJWTHF_Paper8 copy paste as new layer apply mask merge group duplicate merge down
Open SCS_GJWTHF_Paper11 copy paste as new layer with magic wand click in frame modify expand by 5
open p2_bc_autumn_ftu copy paste as new layer invert delete on keyboard select none drag paper under frame add gradient glow & add drop shadow to frame
Open SCS_GJWTHF_Cloud copy paste as new layer resize 75 percent add drop shadow
Open SCS_GJWTHF_Candle2 copy paste as new layer resize 65 percent then again resize at 80 percent duplicate add drop shadow
Open SCS_GJWTHF_SleepingMoon copy paste as new layer resize 45 percent add drop shadow
Open SCS_GJWTHF_TeddyBear1 copy paste as new layer resize 50 percent add drop shadow
Open tube copy paste as new layer drag under frame duplicate send this one to top erase any over lapping add drop shadow to bottom tube 11 11 54 8.70
Add the words Sleepy Time Font Baby Kruffy forground #8690b3 background #4b7e93 add drop shadow 11 11 54 8.70 then apply this inner bevel with this setting
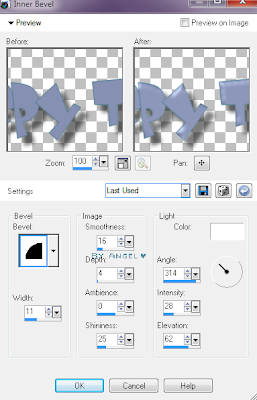
Add your name Font Carpenter Script forground #ffe66a background #acdaea add drop shadow 4 4 54 13.04
Add your copyright info
resize & save your tag
Love to see your results please email to me so i can put in my show off blog
Thankyou ♥
Written by ©Lyn(akaAngel) 23rd March 2011, any similarity to any other tutorial is purely coincidental!
Labels:
Elias Chatzoudis,
PTU ♥
♥ Easter Dreams ♥
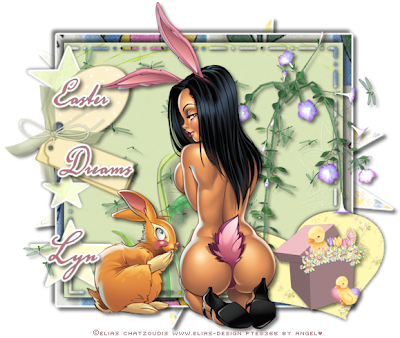
To View the Tag In the proper size click on the Tag
Supplies Needed
Scrapkit by wishing on a starr called Sunny Easter this is FTU you can download kit from
Here
Template 9A by Me this is FTU you will find this
Here
Tube of choice im using ©Elias Chatzoudis can purchase tube here at PSP Tubes Emporium Here
Font of choice or the one im using is Voluta Script Pro
Lets Get Started
Open Template Duplicate close original template delete © Layer
Go to Raster 1 layer selection select all float defloat Open WishingonaStarr_SunnyEaster Paper5 copy paste as new layer invert delete on keyboard select none add gradient glow & add drop shadow 5 5 54 7.25
Go to Raster 2 layer selection select all float defloat Open WishingonaStarr_SunnyEaster Paper7 copy paste as new layer invert delete on keyboard select none add gradient glow & add drop shadow 5 5 54 7.25 then shadow -5 -5 54 7.25
Go to Raster 3 layer selection select all float defloat Open WishingonaStarr_SunnyEaster Paper2 copy paste as new layer invert delete on keyboard select none add gradient glow & add drop shadow 5 5 54 7.25 then shadow -5 -5 54 7.25
Go to Raster 4 layer selection select all float defloat Open WishingonaStarr_SunnyEaster Paper7 copy paste as new layer invert delete on keyboard select none add gradient glow & add drop shadow 1 1 54 7.25 repeat
Go to Raster 5 layer selection select all float defloat Open WishingonaStarr_SunnyEaster Paper6 copy paste as new layer invert delete on keyboard select none add drop shadow 1 1 54 7.25 then -1 -1 54 7.25
Go to Raster 6 layer selection select all float defloat Open WishingonaStarr_SunnyEaster Paper1 copy paste as new layer invert delete on keyboard select none add gradient glow & add drop shadow -1 -1 54 7.25
Go to Raster copy of 6 layer selection select all float defloat Open WishingonaStarr_SunnyEaster Paper1 copy paste as new layer invert delete on keyboard select none add gradient glow & add drop shadow -1 -1 54 7.25
Go to Raster 7 layer selection select all float defloat Open WishingonaStarr_SunnyEaster Paper1 copy paste as new layer invert delete on keyboard select none add gradient glow & add drop shadow -1 -1 54 7.25
Go to Raster copy of raster 7 layer selection select all float defloat Open WishingonaStarr_SunnyEaster Paper1 copy paste as new layer invert delete on keyboard select none add gradient glow & add drop shadow -1 -1 54 7.25
Open WishingonaStarr_SunnyEaster (58) copy paste as new layer resize 80 percent mirror add drop shadow 4 4 54 7.25
Open WishingonaStarr_SunnyEaster (57) copy paste as new layer resize 80 percent add drop shadow 4 4 54 7.25
Open WishingonaStarr_SunnyEaster (7) copy paste as new layer resize 25 percent add drop shadow 4 4 54 7.25
Open WishingonaStarr_SunnyEaster (45) copy paste as new layer resize 45 percent image rotate 20 left add drop shadow 4 4 54 7.25
Open your tube copy paste as new layer add drop shadow 4 4 54 7.25
Add your name & the Words Easter Dreams font Voluta Script Pro forground #9f7d80 background #ca697f add gradient glow & add drop shadow 4 4 54 7.25
Add your copyright info
resize & save your tag
Love to see your results please email to me so i can put in my show off blog
Thankyou ♥
Written by ©Lyn(akaAngel) 23rd March 2011, any similarity to any other tutorial is purely coincidental!
Labels:
Easter,
Elias Chatzoudis,
FTU ♥
♥ Easter Pop ♥
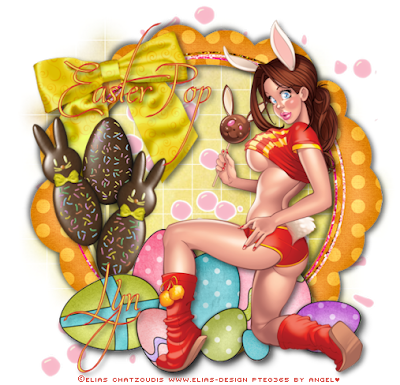
To View Tag In Proper Size Click On The Tag
Supplies Needed
Scrapkit by Sweet Cravings Scraps called Easter Parade this is PTU you can purchase kit from
Here
Tube of choice im using ©Elias Chatzoudis can purchase tube here at PSP Tubes Emporium Here
Mask WSL_Mask 84 at weescotslass Here
Font of choice or the one im using is Valeria Script One
Lets Get Started
Open new image 650x550
Open SCS_EasterParade_Paper3 copy paste as new layer apply mask merge group duplicate merge down
Open SCS_EasterParade_Bubbles1 copy paste as new layer resize 79 percent add gradient glow
Open SCS_EasterParade_Frame1 copy paste as new layer resize 79 percent add gradient glow & add drop shadow 4 4 54 10.80 then -4 -4 54 10.80
Open SCS_EasterParade_CocoPopEgg copy paste as new layer resize 44 percent add drop shadow 4 4 54 10.80
Open SCS_EasterParade_CocoPopBunny copy paste as new layer resize 55 percent image rotate 20 left add drop shadow 4 4 54 10.80 duplicate mirror
Open SCS_EasterParade_Eggs copy paste as new layer resize 75 percent add drop shadow 4 4 54 10.80
Open SCS_EasterParade_Bow2 copy paste as new layer resize 45 percent image rotate 10 left add drop shadow 4 4 54 10.80
Open tube copy paste as new layer add drop shadow 4 4 54 10.80
Add your name & the word Easter Pop Font Valeria Script One forground #d42725 background #ece457 add drop shadow 4 4 54 10.80
Add your copyright info
resize & save your tag
Love to see your results please email to me so i can put in my show off blog
Thankyou ♥
Written by ©Lyn(akaAngel) 23rd March 2011, any similarity to any other tutorial is purely coincidental!
Labels:
Easter,
Elias Chatzoudis,
PTU ♥
♥ Easter ♥
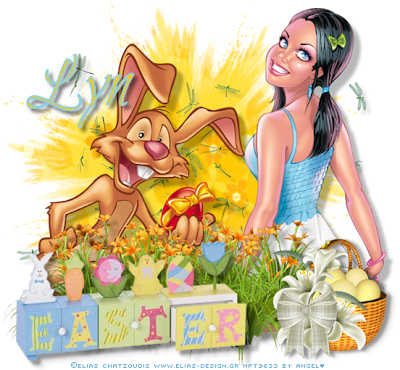
To View Tag In Proper Size Click On The Tag
Supplies Needed
Scrapkit by wishing on a starr called Sunny Easter this is FTU you can download kit from
Here
2 Tube of choice im using ©Elias Chatzoudis he is no longer selling at MPT this is where i brought hes art work & my license
But you can find all hes tubes PSP Tubes Emporium Here
Mask WSL_Mask 38 at weescotslass Here
Font of choice or the one im using is Bilbo
Lets Get Started
Open new image 650x550
Open WishingonaStarr_SunnyEaster Paper4 copy paste as new layer apply mask merge group
Open WishingonaStarr_SunnyEaster (58) copy paste as new layer add drop shadow 7 7 28 7.25
Open tube copy paste as new layer add drop shadow 12 11 28 7.25
Open your second tube copy paste as new layer add drop shadow 12 11 28 7.25
Open WishingonaStarr_SunnyEaster (56) copy paste as new layer add drop shadow 10 11 28 7.25
Open WishingonaStarr_SunnyEaster (38) copy paste as new layer resize 39 percent add drop shadow 2 7 28 7.25 repeat
Open WishingonaStarr_SunnyEaster (51) copy paste as new layer add drop shadow 2 7 28 7.25 repeat
Add your name Font Bilbo forground #8acfe9 background #fec900 add drop shadow 5 5 54 7.25
Add your copyright info
resize & save your tag
Love to see your results please email to me so i can put in my show off blog
Thankyou ♥
Written by ©Lyn(akaAngel) 22nd March 2011, any similarity to any other tutorial is purely coincidental!
Labels:
Easter,
Elias Chatzoudis,
FTU ♥
♥ Welcome To The Jungle ♥
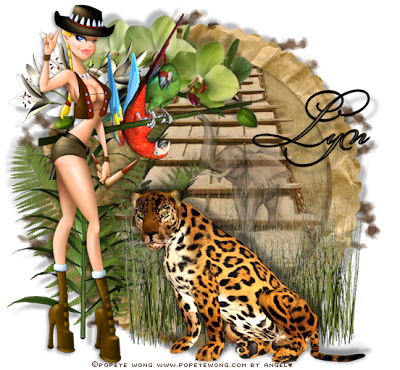
To View Tag In Proper Size Click On The Tag
Supplies Needed
Scrapkit by Sweet Cravings Scraps called Welcome To The Jungle this is PTU you can Purchase kit from
Here
Tubes of choice im using ©Popeye Wong
Here
Mask WSL_Mask 127 at weescotslass
Here
Font of choice or the one im using is BickhamScriptFancy2
Lets Get Started
Drop shadow used in this tut is -9 -9 28 7.25
Open new image 650x550
Open SCS_WelcomeToTheJungle_Frame1 copy paste as new layer resize 70 percent with magic wand click in frame modify expand by 4
open SCS_WelcomeToTheJungle_Paper2 copy paste as new layer invert delete on keyboard select none drag paper under frame add drop shadow to frame 9 9 28 7.25 then repeat -9 -9 28 7.25
Open SCS_WelcomeToTheJungle_WoodBridge go back to the frame click 2 times in the frame with magic wand copy the bridge paste as new layer drag under frame add drop shadow -9 -9 28 7.25
Open SCS_WelcomeToTheJungle_Fern copy paste as new layer resize 60 percent sharpen add drop shadow -9 -9 28 7.25
Open SCS_WelcomeToTheJungle_Flower7 copy paste as new layer resize 65 percent mirror add drop shadow -9 -9 28 7.25
Open SCS_WelcomeToTheJungle_Flower4 copy paste as new layer add drop shadow -9 -9 28 7.25
Open SCS_WelcomeToTheJungle_Macaw2 copy paste as new layer resize 55 percent add drop shadow -9 -9 28 7.25
Open SCS_WelcomeToTheJungle_Elephant copy paste as new layer resize 36 percent lower opacity 68 add drop shadow -9 -9 28 7.25
Open SCS_WelcomeToTheJungle_TallGrass copy paste as new layer resize 60 percent add drop shadow
Open tube copy paste as new layer mirror add drop shadow 2 2 28 7.25
Open SCS_WelcomeToTheJungle_Jaguar copy paste as new layer resize 65 percent add drop shadow -9 -9 28 7.25
Open SCS_WelcomeToTheJungle_Paper5 copy paste as new layer apply mask merge group duplicate merge down arrange send to bottom
Add your name Font BickhamScriptFancy2 forground #000000 background #a0844d add drop shadow 10 11 28 7.25
Add your copyright info
resize & save your tag
Love to see your results please email to me so i can put in my show off blog
Thankyou ♥
Written by ©Lyn(akaAngel) 21st March 2011, any similarity to any other tutorial is purely coincidental!
Labels:
PTU ♥
♥ Boot Scoot & Boogie ♥
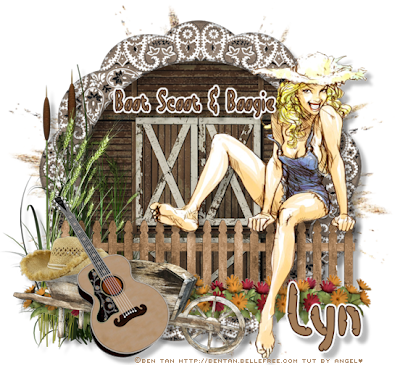
To View Tag In Proper Size Click On The Tag
Supplies Needed
Scrapkit by Sweet Cravings Scraps called Boot,Scoot & Boogie this is PTU you can Purchase kit from
Here
Tubes of choice im using ©Ben Tan
Here
Mask WSL_Mask 38 at weescotslass
Here
Font of choice or the one im using is Bocuma Dent BRK
Lets Get Started
Drop shadow used in this tut is 9 9 28 7.25
Open new image 650x550
Open SCS_BootScoot&Boogie_Bandana Frame 5 copy paste as new layer resize 70 percent with magic wand click in frame modify expand by 4
open SCS_BootScoot&Boogie_Barn copy paste as new layer invert delete on keyboard select none drag paper under frame add drop shadow to frame
Open SCS_BootScoot&Boogie_Grass 2 copy paste as new layer resize 55 percent add drop shadow
Open SCS_BootScoot&Boogie_Grass 4 copy paste as new layer resize 55 percent duplicate mirror merge down add drop shadow
Open SCS_BootScoot&Boogie_Catty Nine Tails copy paste as new layer resize 75 percent sharpen add drop shadow
Open SCS_BootScoot&Boogie_Wheat copy paste as new layer resize 65 percent sharpen add drop shadow
Open SCS_BootScoot&Boogie_Wood Fence copy paste as new layer resize 65 percent add drop shadow
Open SCS_BootScoot&Boogie_flowerRow copy paste as new layer resize 70 percent add drop shadow
Open SCS_BootScoot&Boogie_Wheel Barrow copy paste as new layer resize 54 percent add drop shadow
Open SCS_BootScoot&Boogie_Straw Hat copy paste as new layer resize 25 percent add drop shadow
Open SCS_BootScoot&Boogie_Guitar copy paste as new layer resize 44 percent add drop shadow
Open tube copy paste as new layer resize 90 percent add drop shadow
Open SCS_BootScoot&Boogie_Paper (15) copy paste as new layer apply mask merge group duplicate merge down arrange send to bottom
Add your name & the words Boot Scoot & Boogie Font Bocuma Dent BRK forground #4d3427 background #a17b57 add drop shadow
Add your copyright info
resize & save your tag
Love to see your results please email to me so i can put in my show off blog
Thankyou ♥
Written by ©Lyn(akaAngel) 21st March 2011, any similarity to any other tutorial is purely coincidental!
Labels:
PTU ♥
♥ Bird Watching ♥
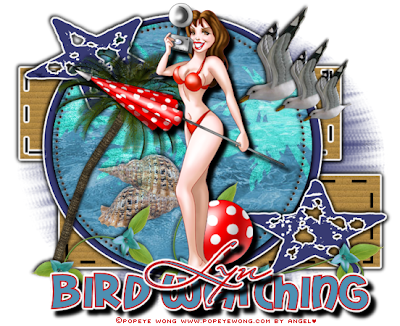
To View the Tag In the proper size click on the Tag
Supplies Needed
Scrapkit by Creative Disorder Scraps called Spring Break this is FTU you can download kit from
Here
Template 8A by Me this is FTU you will find this
Here
Mask by Me this is FTU you will find this
Here
Tube of choice im using ©Popeye Wong this is FTU Here
Font of choice or the one im using is Mail Ray Stuff & Mr Lackboughs
Lets Get Started
Open Template Duplicate close original template delete © Layer canvas size 750x600
Go to Raster 2 layer selection select all float defloat open Paper1 invert delete on keyboard select none effects texture effects blinds with this setting
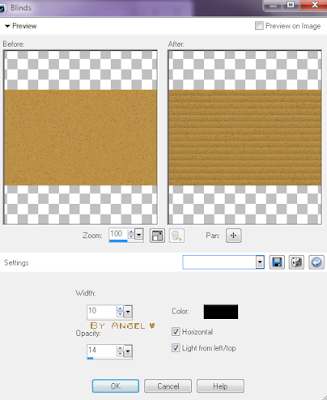
add gradient glow & add drop shadow 2 2 100 7.25 black repeat drop shadow -2 -2 100 7.25
Go to Copy of Raster 2 layer selection select all float defloat open Paper1 invert delete on keyboard select none effects texture effects blinds same setting as before
add gradient glow & add drop shadow 2 2 100 7.25 black repeat drop shadow -2 -2 100 7.25
Go to Raster 3 layer add gradient glow
Go to Copy of Raster 3 add gradient glow
Go to Raster 4 layer selection select all float defloat invert open Paper3 invert delete on keyboard select none add drop shadow same setting as before
Go to Raster 5 layer selection select all float defloat open Paper4 select none add drop shadow -2 -2 100 7.25
Go to Raster 6 layer selection select all float defloat open Paper2 select none add drop shadow 2 2 100 7.25 black repeat drop shadow -2 -2 100 7.25
Go to Raster 7 layer selection select all float defloat open Paper3 select none add drop shadow 2 2 100 7.25 black repeat drop shadow -2 -2 100 7.25
Go to Copy of Raster 7 layer selection select all float defloat open Paper3 select none add drop shadow 2 2 100 7.25 black repeat drop shadow -2 -2 100 7.25
Open PalmTree1 copy paste as new layer resize 75 percent add drop shadow 2 2 100 7.25 black
Open SeaShell copy paste as new layer resize 65 percent duplicate mirror merge down add drop shadow 2 2 100 7.25 black lower opacity 73
Open SpringFlowerDeco copy paste as new layer resize 65 percent add drop shadow 2 2 100 7.25 black
Open Seagull copy paste as new layer resize 40 percent duplicate 75 percent duplicate 85 percent add drop shadow 2 2 100 7.25 black to all seagulls
Open your tube copy paste as new layer if using same as mine mirror add drop shadow 9 9 100 7.25
Open paper 3 copy paste as new layer apply mask merge group send to bottom
Add the words Bird Watching Font Mail Ray Stuff forground #b68d47 background #4e90b2 add gradient glow & add drop shadow 9 9 100 7.25
Add your name Font Mr Lackboughs forground #b68d47 background #4e90b2 add gradient glow & add drop shadow 9 9 100 7.25
Add your copyright info
resize & save your tag
Love to see your results please email to me so i can put in my show off blog
Thankyou ♥
Written by ©Lyn(akaAngel) 21st March 2011, any similarity to any other tutorial is purely coincidental!
♥Rock n Roll ♥
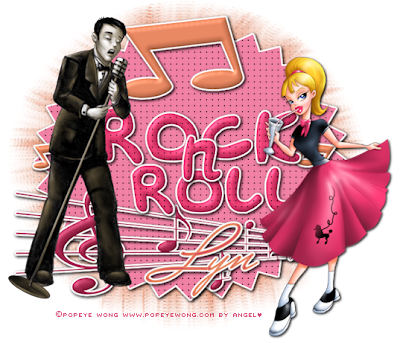
To View the Tag In the proper size click on the Tag
Supplies Needed
Template 12A by Me this is FTU you will find this
Here
Mask by Me this is FTU you will find this
Here
Tube of choice im using ©Popeye Wong this is FTU
Here
Font of choice or the one im using is MrBlaketon
Lets Get Started
Open Template Duplicate close original template delete © Layer canvas size 750x600
Go to Raster 1 layer selection select all float defloat new raster layer flood fill #f283a6 select none effects texture weave with this setting

add gradient glow & add drop shadow
Go to Raster 2 layer selection select all float defloat new raster layer flood fill #f283a6 select none effects inner bevel with this setting
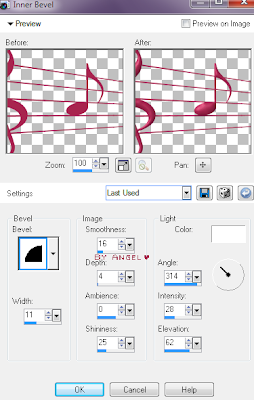
add gradient glow & add drop shadow
Go to Raster 3 layer selection select all float defloat new raster layer flood fill #e3825c select none effects inner bevel same as before add gradient glow & add drop shadow
Go to Raster 4 layer selection select all float defloat new raster layer flood fill #e3825c select none effects inner bevel same as before add gradient glow & add drop shadow
Go to Raster 5 layer selection select all float defloat new raster layer flood fill #e3825c select none effects inner bevel same as before add gradient glow & add drop shadow
Go to Raster 6 layer selection select all float defloat new raster layer flood fill #e5396e select none effects texture same as before effects inner bevel same as before add gradient glow & add drop shadow
Go to Raster 7 layer selection select all float defloat new raster layer flood fill #e5396e select none effects texture same as before effects inner bevel same as before add gradient glow & add drop shadow
Go to Raster 8 layer selection select all float defloat new raster layer flood fill #e5396e select none effects texture same as before effects inner bevel same as before add gradient glow & add drop shadow
Open both tubes copy paste as new layer resize both at 80 percent
new raster layer flood fill apply mask merge group apply weave same setting as before arrange send to bottom
Add your name Font MrBlaketon forground #e88964 background #d63768 add gradient glow & add drop shadow
Add your copyright info
resize & save your tag
Love to see your results please email to me so i can put in my show off blog
Thankyou ♥
Written by ©Lyn(akaAngel) 20th March 2011, any similarity to any other tutorial is purely coincidental!
Labels:
FTU ♥
♥ Hot Lips ♥
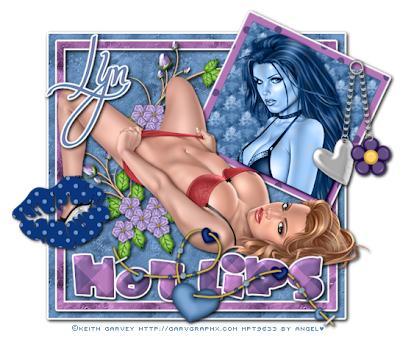
To View the Tag In the proper size click on the Tag
Supplies Needed
Scrapkit by Fantasy Moments called Happy Moments this is FTU Can be downloaded
Here
Template 10A by Me this is FTU you will find this
Here
Tube of choice im using ©Keith Garvey he is no longer selling at MPT this is where i brought hes art work & my license
But you can find all hes tubes PSP Tubes Emporium
Here
Font of choice or the one im using is Valeria Script One
Lets Get Started
Open Template Duplicate close original template delete © Layer
Go to Raster 2 layer selection select all float defloat Open FM-Happy Moments Paper-15 copy paste as new layer invert delete on keyboard select none add gradient glow & add drop shadow
Go to Raster 3 layer selection select all float defloat FM-Happy Moments Paper-14 copy paste as new layer invert delete on keyboard select none
Open FM-Happy Moments Element-59 copy paste as new layer resize 57 percent add drop shadow
Go to raster 4 layer selection select all float defloat Open FM-Happy Moments Paper-3 copy paste as new layer invert delete on keyboard select none add gradient glow
Go to Raster 5 layer selection select all float defloat Open FM-Happy Moments Paper-19 copy paste as new layer invert delete on keyboard Open tube copy paste as new layer delete on keyboard blend mode Luminace (L)
Open main tube copy paste as new layer add drop shadow
Go to raster 6 layer selection select all float defloat Open FM-Happy Moments Paper-9 copy paste as new layer invert delete on keyboard select none apply effects inner bevel with this setting

add gradient glow & add drop shadow
Go to raster 7 layer selection select all float defloat Open FM-Happy Moments Paper-8 copy paste as new layer invert delete on keyboard select none add gradient glow & add drop shadow
Open FM-Happy Moments Element-11 copy paste as new layer resize 45 percent add drop shadow
Open FM-Happy Moments Element-32 copy paste as new layer resize 45 percent add drop shadow
Add your name Font Valeria Script One forground #5682b1 background #9d74af add drop shadow
Add your copyright info
resize & save your tag
Love to see your results please email to me so i can put in my show off blog
Thankyou ♥
Written by ©Lyn(akaAngel) 20th March 2011, any similarity to any other tutorial is purely coincidental!
Labels:
FTU ♥,
Keith Garvey
♥ Peaceful ♥

To View the Tag In the proper size click on the Tag
Supplies Needed
Scrapkit by Fantasy Moments called Kimberley this is FTU Can be downloaded
Here
Mask WSL_Mask 84 at weescotslass
Here
Mask WSL_Mask 343 at weescotslass
Here
Tube of choice im using ©Zindy Nielsen this is FTU you will find this
Here
2 Fonts of choice or the one im using is Morse Kode2 & Miss Lankfort
Lets Get Started
Open FM-K-Papers-4 copy paste as new layer apply mask84 merge group
Open FM-K-Papers-7 copy paste as new layer apply mask343 merge group
Open FM-K-Elements-69 copy paste as new layer resize 70 percent effects enhance effects enhance more add drop shadow
Open FM-K-Elements-64 copy paste as new layer resize 30 percent add drop shadow
Copy FM-K-Elements-64 copy paste as new layer resize 20 percent add drop shadow
Copy FM-K-Elements-64 copy paste as new layer resize 20 percent add drop shadow
Open FM-K-Elements-24 copy paste as new layer resize 52 percent add drop shadow
Add the word Peaceful Font Morse Kode2 forground #000000 background #877e82 add drop shadow
Open FM-K-Elements-50 copy paste as new layer resize 32 percent image rotate 30 percent right add drop shadow
duplicate 2 times mirror 1 of them resize both at 80 percent arrange on tag
Add your name Font Miss Lankfort forground #000000 background #877e82 add drop shadow
Add your copyright info
resize & save your tag
Love to see your results please email to me so i can put in my show off blog
Thankyou ♥
Written by ©Lyn(akaAngel) 20th March 2011, any similarity to any other tutorial is purely coincidental!
Labels:
FTU ♥,
Zindy Nielson
♥ I Love You Sexy ♥
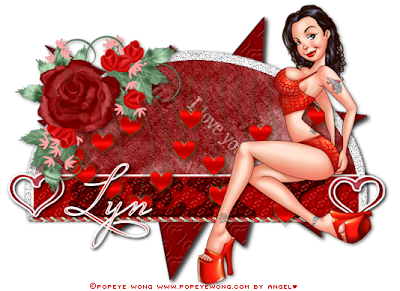
To View the Tag In the proper size click on the Tag
Supplies Needed
Scrapkit by Fantasy Moments called Sweet Valentine this is FTU Can be downloaded
Here
Template 7A by Me this is FTU you will find this
Here
Tube of choice im using ©Popeye Wong this is FTU you will find this
Here
Font of choice or the one im using is Miss Le Gatees
Lets Get Started
Open Template Duplicate close original template delete © Layer
Go to Raster 1 layer selection select all float defloat Open FM-Sweet Valentine Paper-20 copy paste as new layer invert delete on keyboard select none add drop shadow repeat shadow
Go to raster 2 adjust sharpen add drop shadow
Go to Raster 3 layer selection select all float defloat Open FM-Sweet Valentine Paper-6 copy paste as new layer invert delete on keyboard select none
Go to raster 4 layer selection select all float defloat Open FM-Sweet Valentine Paper-17 copy paste as new layer invert delete on keyboard select none add gradient glow
Go to Raster 5 layer selection select all float defloat Open FM-Sweet Valentine Paper-16 copy paste as new layer invert delete on keyboard add drop shadow
Go to raster 6 layer selection select all float defloat Open FM-Sweet Valentine Paper-1 copy paste as new layer invert delete on keyboard select none add gradient glow & add drop shadow
Go to raster 6 layer selection select all float defloat Open FM-Sweet Valentine Paper-1 copy paste as new layer invert delete on keyboard select none add gradient glow & add drop shadow
Open FM-Sweet Valentine-Element-7 copy paste as new layer resize 45 percent add drop shadow
Open FM-Sweet Valentine-Element-75 copy paste as new layer resize 40 percent add drop shadow
Open FM-Sweet Valentine-Element-20 copy paste as new layer resize 45 percent then with pick tool bring in on sides sharpen 2 times add drop shadow drag under the heart layers
Add your name Font Miss Le Gatees forground #ffffff background #c40000 add drop shadow
Add your copyright info
resize & save your tag
Love to see your results please email to me so i can put in my show off blog
Thankyou ♥
Written by ©Lyn(akaAngel) 19th March 2011, any similarity to any other tutorial is purely coincidental!
Labels:
FTU ♥,
Sexy,
Valentines
♥ Happy Easter ♥
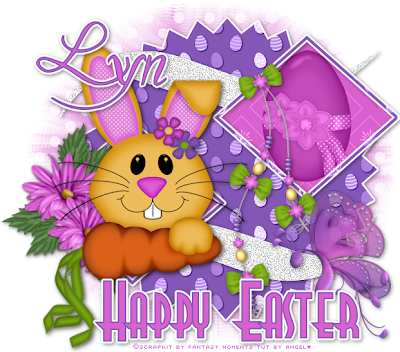
To View the Tag In the proper size click on the Tag
Supplies Needed
Scrapkit by Fantasy Moments called Sweet Easter this is FTU Can be downloaded
Here
Mask by Me This is FTU
Here
Template 5A by Me this is FTU you will find this
Here
Font of choice or the one im using is Pavane & REALVIRTUE
Lets Get Started
Open Template Duplicate close original template canvas size 650x600 delete © Layer
Open FM-Sweet-Easter Paper-28 copy paste as new layer apply mask merge send to bottom
Go to Raster 2 layer selection select all float defloat Open FM-Sweet-Easter Paper-10 copy paste as new layer invert delete on keyboard select none add gradient glow add drop shadow
Go to raster 3 add drop shadow adjust sharpen
Go to copy of raster 3 add drop shadow adjust sharpen
Go to Raster 4 layer selection select all float defloat Open FM-Sweet-Easter Paper-12 copy paste as new layer invert delete on keyboard Open FM-Sweet-Easter- Element-21 copy paste as new layer delete on keyboard select none Blend mode Luminace (L)add drop shadow
Go to raster 5 layer selection select all float defloat Open FM-Sweet-Easter Paper-18 copy paste as new layer invert delete on keyboard select none add gradient glow & add drop shadow
Go to Raster 6 layer selection select all float defloat Open FM-Sweet-Easter Paper-12 copy paste as new layer invert delete on keyboard
Go to raster 7 layer selection select all float defloat Open FM-Sweet-Easter Paper-18 copy paste as new layer invert delete on keyboard select none add gradient glow & add drop shadow
Open FM-Sweet-Easter- Element-5 copy paste as new layer resize 54 percent add drop shadow
Open FM-Sweet-Easter- Element-62 copy paste as new layer resize 71 percent add drop shadow
Open FM-Sweet-Easter- Element-39 copy paste as new layer resize 67 percent add drop shadow
Open FM-Sweet-Easter- Element-2 copy paste as new layer resize 45 percent mirror add drop shadow
Add your name Font Pavane forground #8457b6 background #d961cf add gradient glow & add drop shadow
Add the words Happy Easter Font REALVIRTUE forground #8457b6 background #d961cf add gradient glow & add drop shadow
Add your copyright info
resize & save your tag
Love to see your results please email to me so i can put in my show off blog
Thankyou ♥
Written by ©Lyn(akaAngel) 19th March 2011, any similarity to any other tutorial is purely coincidental!
♥ Spring Fashion ♥
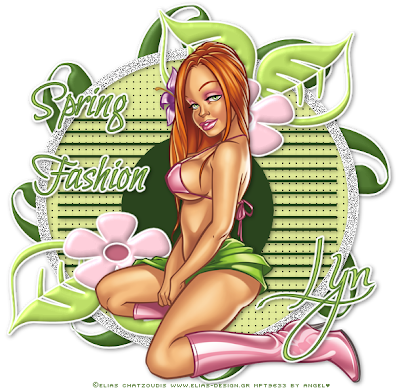
Supplies Needed
Template04 by Me this is FTU you will find this
Here
Tube of choice im using ©Elias Chatzoudis he is no longer selling at MPT this is where i brought hes art work & my license
But you can find all hes tubes PSP Tubes Emporium
Here
Font of choice or the one im using is Valeria Script One & Bilbo
Lets Get Started
Open Template Duplicate close original delete ©Angel Layer
Go to Raster 1 layer selection select all float defloat new raster layer flood fill #49712a invert delete on keyboard select none apply inner bevel with this setting
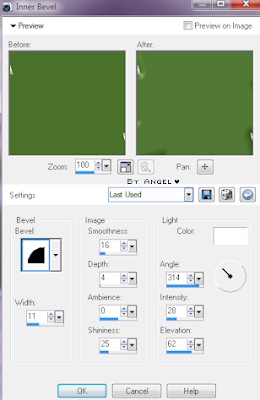
add gradient glow & drop shadow delete original layer
Go to Raster 2 layer selection select all float defloat new raster layer flood fill #e3ec9a select none effects weave with this setting

Go to Raster 3 layer selection select all float defloat new raster layer flood fill #2a441e select none add drop shadow
Go to raster 4 Effects Enhance add drop shadow
Go to Raster 5 layer selection select all float defloat new raster layer flood fill #b8da60 select none delete original layer effects inner bevel same setting as before add gradient glow & add drop shadow
Repeat layer 6 as you did layer 5
Repeat layer 7 as you did layer 6 & 5
Repeat layer 8 as you did layer 7 & 6 & 5
Go to Raster 9 layer selection select all float defloat flood fill #c56a80 select none delete original layer
Go to Raster 10 layer selection select all float defloat flood fill #c56a80 select none delete original layer
Go to Raster 11 layer selection select all float defloat new raster layer flood fill #f9c9d5 select none apply same inner bevel as before add gradient glow & drop shadow
Go to Raster 12 layer selection select all float defloat new raster layer flood fill #f9c9d5 select none apply same inner bevel as before add gradient glow & drop shadow
Open tube copy paste as new layer add drop shadow
Add the words Spring Fashion Font Bilbo forground #587e39 background #bedf68 add gradient glow & add drop shadow
Add your name Font Valeria Script One forground #587e39 background #bedf68 add gradient glow & add drop shadow
Add your copyright info
resize & save your tag
Love to see your results please email to me so i can put in my show off blog
Thankyou ♥
Written by ©Lyn(akaAngel) 18th March 2011, any similarity to any other tutorial is purely coincidental!
Labels:
Elias Chatzoudis,
No Scrap ♥,
Spring
♥ My Journal ♥

To view tag in proper size click the tag
Supplies Needed
Scrapkit by Bea creations called Girlz this is FTU can be downloaded
Here
Tube of choice im using ©Tim Lowery to purchase this tube at PTE
Here
Mask WSL_Mask 311 at weescotslass
Here
Font of choice or the one im using is Valeria Script One
Lets Get Started
Open p17_bc_girlz_freebie copy paste as new layer apply mask merge group
Open mask02_bc_girlz_freebie copy paste as new layer resize 80 percent add drop shadow
Open p10_bc_girlz_freebie copy paste as new layer click in frame with magic wand modify expand by 2
Open p09_bc_girlz_freebie copy paste as new layer invert delete on keyboard drag paper under frame select none
Open your tube copy paste as new layer duplicate drag this one under frame go back to top erase any over lapping do the same with bottom tube
add drop shadow to frame & bottom tube
Open deco01_bc_girlz_freebie copy paste as new layer
Open splat01_bc_girlz_freebie copy paste as new layer add drop shadow drag under frame
Open doddle04_bc_girlz_freebie copy paste as new layer add drop shadow
Open flower11_bc_girlz_freebie copy paste as new layer resize 66 percent add drop shadow duplicate resize 44 percent duplicate arrange on tag
Open journal03_bc_girlz_freebie resize 34 percent image rotate 25 percent left add drop shadow
Open key01_bc_girlz_freebie resize 36 percent add drop shadow
Open bunny01_bc_girlz_freebie copy paste as new layer resize 85 percent add drop shadow
Add your name & the words My Journal Font Valeria Script One forground Null background #ffffff add drop shadow
Add your copyright info
resize & save your tag
Love to see your results please email to me so i can put in my show off blog
Thankyou ♥
Written by ©Lyn(akaAngel) 18th March 2011, any similarity to any other tutorial is purely coincidental!
Labels:
FTU ♥
♥ Girlz ♥
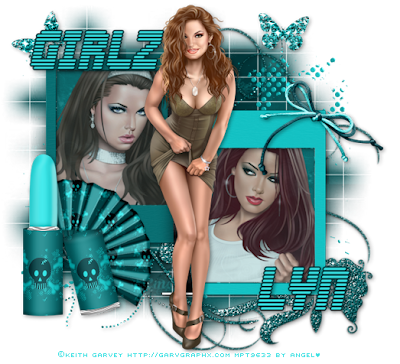
To view tag in proper size click the tag
Supplies Needed
Scrapkit by Bea creations called Girlz this is FTU can be downloaded
Here
3 Tubes of choice im using ©Keith Garvey he is no longer selling at MPT this is where i brought hes art work & my license
But you can find all hes tubes at PTE
Here
Mask WSL_Mask 84 at weescotslass
Here
Font of choice or the one im using is Abduction2000
Lets Get Started
Open p07_bc_girlz_freebie copy paste as new layer apply mask merge group
Open doddle04_bc_girlz_freebie copy paste as new layer add drop shadow
Open deco01_bc_girlz_freebie copy paste as new layer
Open doddle05_bc_girlz_freebie copy paste as new layer add drop shadow
Open frame05_bc_girlz_freebie copy paste as new layer click in both frames with magic wand modify expand by 2
open p10_bc_girlz_freebiecopy paste as new layer invert delete on keyboard drag paper under frame open your tubes copy paste as new layer delete on keyboard to each tube lower opacity 76 drag both tubes under frame select none add drop shadow to frame & both tubes
Open your main tube copy paste as new layer add drop shadow
Open bow03_bc_girlz_freebie copy paste as new layer add drop shadow
Open fan01_bc_girlz_freebie copy paste as new layer resize 54 percent add drop shadow
Open lipstick01_bc_girlz_freebie copy paste as new layer add drop shadow
Add your name & the word Girlz Font Abduction2000 forground #013538 background #37e0e2 add drop shadow
Add your copyright info
resize & save your tag
Love to see your results please email to me so i can put in my show off blog
Thankyou ♥
Written by ©Lyn(akaAngel) 18th March 2011, any similarity to any other tutorial is purely coincidental!
Labels:
FTU ♥,
Keith Garvey
♥ Spring Time ♥
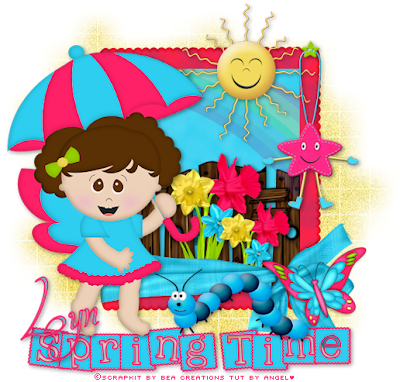
To view tag in proper size click the tag
Supplies Needed
Scrapkit by Bea creations called Spring is here this is FTU Can be downloaded
Here
Mask WSL_Mask 84 at weescotslass
Here
Font of choice or the one im using is 2Peas Gone Postal & Mon Amour Script Alt
Lets Get Started
Open p04_bc_springishere copy paste as new layer apply mask merge group add remove noise Gaussin 25 Monochrome checked
Open frame07_bc_springishere copy paste as new layer click frame with magic wand modify expand by 2
open p18_bc_springishere copy paste as new layer invert delete on keyboard drag paper under frame add drop shadow to frame
Open butterfly02_bc_springishere copy paste as new layer resize 67 percent mirror add drop shadow
Open deco01_bc_springishere copy paste as new layer resize 50 percent add drop shadow
Open fence01_bc_springishere copy paste as new layer drag under frame add drop shadow
Open rainbow01_bc_springishere copy paste as new layer drag under frame erase bit that is overlapping
open flower01_bc_springishere copy paste as new layer resize 59 percent
open flower02_bc_springishere copy paste as new layer resize 49 percent
open flower03_bc_springishere copy paste as new layer resize 55 percent merge down flowers together duplicate resize 75 percent merge down drag these under the frame
Open sun01_bc_springishere copy paste as new layer resize 36 percent add drop shadow
Add the words Spring Time Font 2Peas Gone Postal size 48 pixels forground #fe2167 background #2ecef0 add drop shadow
Open girl02_bc_springishere copy paste as new layer add drop shadow
Open earthworm01_bc_springishere copy paste as new layer add drop shadow
Add your name Font Mon Amour Script Alt forground #fe2167 background #2ecef0 add drop shadow
Add your copyright info
resize & save your tag
Love to see your results please email to me so i can put in my show off blog
Thankyou ♥
Written by ©Lyn(akaAngel) 18th March 2011, any similarity to any other tutorial is purely coincidental!
♥ Pause Cafe ♥
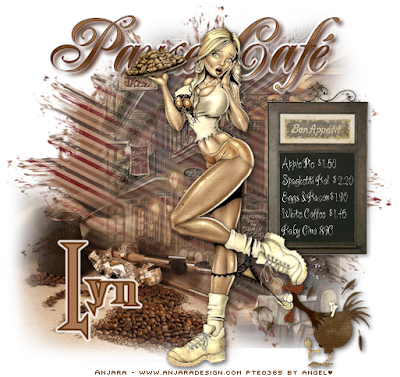
To View Tag In Proper Size Click On The Tag
Supplies Needed
Scrapkit by cajoline-scrap called Pause Cafe this is FTU you can download kit from
Here
Tube of choice im using ©Anjara From PTE
Here
Mask WSL_Mask 84 at weescotslass
Here
Font of choice or the one im using is Confection & JackBisio
Lets Get Started
Open new image 650x550
Open CAJ.SCR.FR PAUSE-CAFE 32 copy paste as new layer apply mask merge group
Open CAJ.SCR.FR PAUSE-CAFE 60 copy paste as new layer lower opacity 75
Open CAJ.SCR.FR PAUSE-CAFE 2 copy paste as new layer resize 74 percent
Open CAJ.SCR.FR PAUSE-CAFE 4 copy paste as new layer add gradient glow
Open CAJ.SCR.FR PAUSE-CAFE 21 copy paste as new layer resize 55 percent add drop shadow
Add the words White Coffee Apple Pie $1..50 Spaghetti Bol $2..20 Eggs & Bacon $1.90 White Coffee $1.45 Baby Cino 89C Font Confection size 20 pixels forground null background #ffffff Edge effects Enhance add drop shadow
Open tube copy paste as new layer add drop shadow
Add your name Font JackBisio forground #5f310d background #a57753 add drop shadow
Add your copyright info
resize & save your tag
Love to see your results please email to me so i can put in my show off blog
Thankyou ♥
Written by ©Lyn(akaAngel) 15th March 2011, any similarity to any other tutorial is purely coincidental!
Labels:
FTU ♥
Subscribe to:
Posts (Atom)
♥ My Time ♥
♥ My Exclusive Tuts ♥
You can view My Exclusive tuts
Here
You will need to join the Forum
♥ User online ♥
♥ Tube Stores ♥
Labels
- Animated
- Arthur Crowe
- Autumn
- Awards ♥
- Birthday
- Christmas
- Dean Yeagle
- Easter
- Elias Chatzoudis
- FTU ♥
- Halloween
- Ismael Rac
- Jamie Kidd
- Joel Adams
- Keith Garvey
- Kiwi Fire Storm
- Lady Mishka
- Martin Abel
- Michael Landefield
- Myka Jelina
- No Scrap ♥
- Nolan Worthington
- Pinuptoons
- Popeye Wong
- PsycoJimi
- PTU
- PTU ♥
- Robin Mcquay ♥
- Sad News ♥
- Scott Blair ♥
- Sexy
- Spring
- Summer
- Suzanne Woolcott
- Thankyou ♥
- Tony Tzanoukakis
- Valentines
- Winter
- Zindy Nielson
